
Want to learn how to make a Spider Man mask that looks amazing without spending tons of money. You’re in the right place.
Making your own Spider-Man mask is way easier than you think, and I’m going to show you exactly how to do it step by step.
Whether you need it for Halloween, cosplay, or just for fun, this guide will help you create an awesome mask that will make everyone think you bought it from a store.
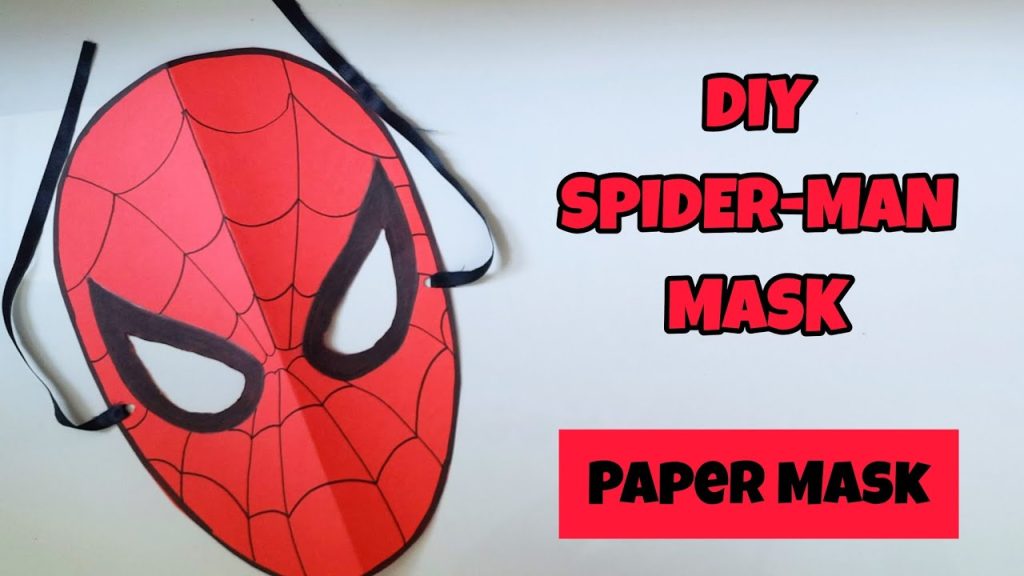
Table of Contents
Why Make Your Own Spider Man Mask?
Creating a homemade Spider Man mask gives you total control over the final product.
Store-bought masks can cost anywhere from $30 to $200.
Making your own costs under $10 in most cases.
Plus, you get the satisfaction of creating something with your own hands.
Materials You’ll Need for Your Spider Man Mask
How to make a Spider Man mask at home starts with gathering the right materials.
Don’t worry – you probably have most of these already.
Basic Materials for All Methods:
- Red fabric or paper
- Black marker or paint
- Scissors
- Glue or tape
- Pencil for sketching
- Ruler or measuring tape
- String or elastic band
For Cardboard Version:
- Cardboard sheets
- Box cutter (adult supervision required)
- Black permanent markers
- Red spray paint or acrylic paint
For Fabric Version:
- Red spandex or cotton fabric
- Black fabric paint or markers
- Sewing machine or needle and thread
- Pattern paper
For Moving Eyes/Lenses:
- Clear plastic sheets
- Small hinges or flexible material
- Wire or thin metal strips
- Mirror film or reflective material
Method 1: How to Make a Spider Man Mask Out of Paper
Making a Spider Man mask out of paper is perfect for beginners and kids.
This method is super quick and requires minimal materials.
Step 1: Create Your Template
- Start by measuring your face from ear to ear and from forehead to chin.
- Draw an oval shape on paper that matches these measurements.
- Add about 2 inches extra space around the edges for comfort.
- Mark where your eyes, nose, and mouth will be.
Step 2: Cut Out the Basic Shape
- Use scissors to cut out your oval template.
- Cut eye holes that are slightly larger than your actual eyes.
- This gives you better vision when wearing the mask.
- Make the eye holes almond-shaped like Spider-Man’s mask.
Step 3: Add the Spider Web Pattern
- The Spider Man mask template always includes the iconic web pattern.
- Start by drawing a line down the center of the mask.
- Draw curved lines from this center line to create the web effect.
- Make sure the lines get closer together near the edges.
- Add small connecting lines between the main web lines.
Step 4: Color and Finish
- Use red markers or paint to color the entire mask.
- Leave the web lines black or trace over them with black marker.
- Let everything dry completely before wearing.
- Add elastic string or ribbon to the sides so you can wear it.
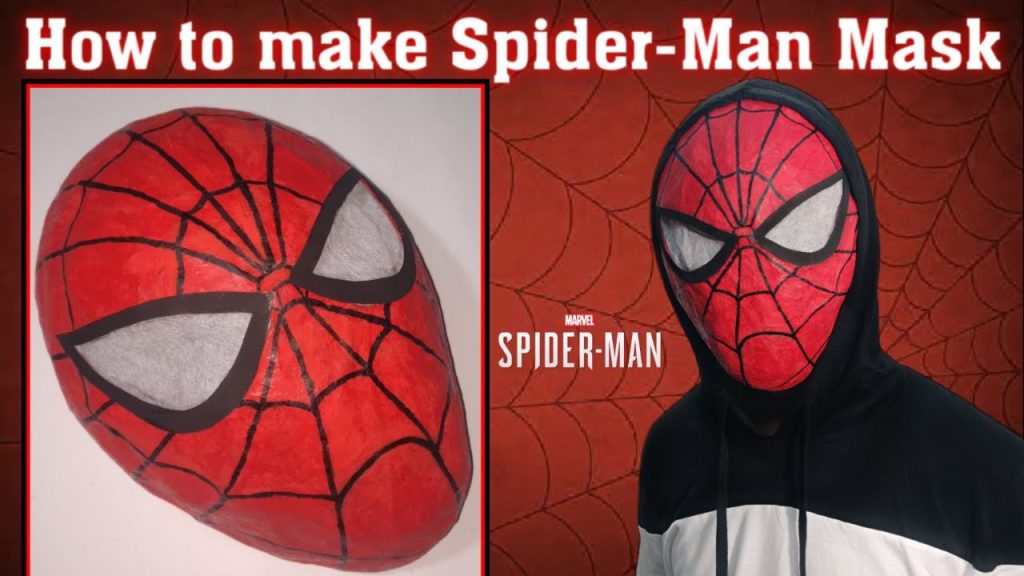
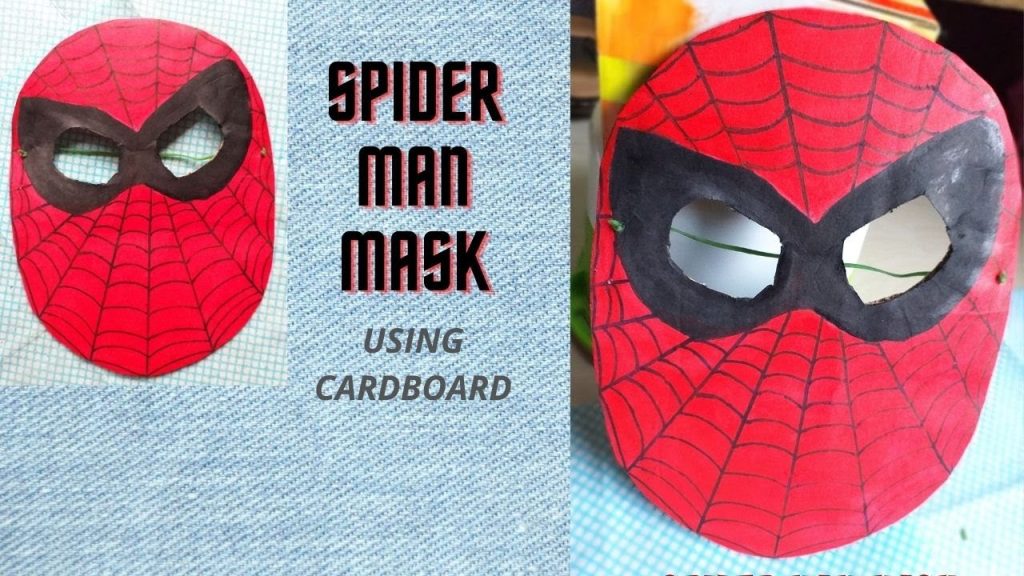
Method 2: How to Make a Spider Man Mask with Cardboard
Cardboard Spider Man masks are more durable and look more professional.
This method takes a bit more time but gives amazing results.
Step 1: Design Your Cardboard Template
- Cardboard is thicker than paper, so you need to be more precise with your measurements.
- Trace your face outline on the cardboard.
- Make sure to leave extra space around the edges for a comfortable fit.
- Use a ruler to make straight lines for the web pattern.
Step 2: Cut the Cardboard Carefully
- Use a sharp box cutter to cut out the mask shape.
- Adult supervision is required for kids during this step.
- Cut the eye holes carefully – cardboard can be tricky to cut smoothly.
- Sand the edges lightly to make them smooth and safe.
Step 3: Paint the Base Color
- Apply red paint evenly across the entire mask surface.
- Use spray paint for the smoothest finish, or brush on acrylic paint.
- Let the first coat dry completely before applying a second coat.
- Two thin coats look better than one thick coat.
Step 4: Add the Web Details
- Once the red paint is dry, use black paint or markers for the web pattern.
- Start with the center line and work outward.
- Use a ruler to keep your lines straight and even.
- The web should look symmetrical on both sides of the mask.
Step 5: Final Assembly
- Attach elastic bands or ribbon to both sides of the mask.
- Test the fit before finalizing the attachment points.
- Add padding inside the mask if needed for comfort.
- Consider adding small foam pieces where the mask touches your face.
Method 3: How to Make a Spider Man Mask for Kids
Making a Spider Man mask for kids requires extra attention to safety and comfort.
Kids need masks that are lightweight and won’t hurt their faces.
Safety Considerations for Kids’ Masks
- Never use sharp tools around children.
- Make sure all edges are smooth and rounded.
- Use non-toxic materials only.
- Ensure the mask doesn’t obstruct breathing or vision.
Kid-Friendly Materials
- Paper plates work great as a base for kids’ masks.
- Use washable markers instead of permanent ones.
- Craft foam is safer than cardboard for young children.
- Velcro strips can replace elastic bands for easier wearing.
Step-by-Step Kid Version
- Start with a paper plate as your base shape.
- Let kids help with measuring and marking eye holes.
- Use safety scissors for all cutting activities.
- Allow kids to color and decorate their own masks.
- Make the eye holes extra large for better vision.
- Add their name or initials in small letters inside the mask.
Method 4: How to Make a Spider Man Mask Out of Fabric
Fabric Spider Man masks are the most comfortable to wear for long periods.
This method requires basic sewing skills but creates professional results.
Choosing the Right Fabric
- Red spandex gives the most authentic Spider-Man look.
- Cotton fabric works well but doesn’t stretch as much.
- Avoid fabrics that are too thick or heavy.
- Make sure the fabric allows some air circulation.
Creating Your Fabric Pattern
- Measure your head circumference and face length.
- Create a pattern that covers from your hairline to under your chin.
- The mask should wrap slightly around the sides of your head.
- Add seam allowances to all edges of your pattern.
Cutting and Sewing the Fabric
- Cut two identical pieces from your fabric.
- Pin the pieces together with the right sides facing inward.
- Sew around the edges, leaving the bottom open for your head.
- Turn the mask right-side out through the bottom opening.
Adding the Web Pattern to Fabric
- Use fabric paint or permanent markers for the web design.
- Let each section dry before moving to the next.
- Consider using black fabric strips sewn on for a raised web effect.
- This creates a more three-dimensional appearance.
Finishing Touches for Fabric Masks
- Hem the bottom opening to prevent fraying.
- Add elastic or ties if you prefer not to pull it over your head.
- Consider lining the inside with soft fabric for extra comfort.
- Test wash a small section to make sure colors don’t run.
Method 5: How to Make a Spider Man Mask with Moving Eyes
Creating moving eyes takes your mask to the next level.
This advanced technique makes your mask look incredibly realistic.
Understanding the Moving Eye Mechanism
- Moving eyes work by using flexible materials that respond to head movement.
- The “eyes” are usually reflective lenses that change appearance.
- Some versions use actual mechanical parts for movement.
- Others rely on optical illusions to create the moving effect.
Materials for Moving Eyes
- Clear acrylic or plastic sheets for the base lenses.
- Reflective film or mirror material.
- Flexible wire or thin metal strips.
- Small hinges if you want actual mechanical movement.
- Magnifying glasses can be repurposed for lens effects.
Building the Eye Mechanism
- Cut the eye shapes from clear plastic slightly larger than the eye holes.
- Apply reflective film to create the mirror effect.
- Attach flexible wire around the edges of each “eye.”
- The wire allows the eyes to move slightly when you move your head.
- Mount the eyes behind the mask’s eye holes using small clips or glue.
Testing and Adjusting Moving Eyes
- Wear the mask and move your head in different directions.
- The eyes should appear to follow your movement naturally.
- Adjust the flexibility of the wire if the movement seems too stiff or too loose.
- Make sure the moving parts don’t obstruct your actual vision.
Method 6: How to Make a Spider Man Mask with Moving Lenses
Moving lenses create an even more advanced effect than moving eyes.
This technique is used in professional movie props and high-end cosplay.
Types of Moving Lens Effects
- Zoom lenses that appear to focus in and out.
- Iris effects that open and close like camera apertures.
- Color-changing lenses that shift from light to dark.
- Motorized lenses controlled by small servos.
Electronic Components for Advanced Lenses
- Small servo motors for actual mechanical movement.
- Arduino microcontroller for programming the movements.
- Sensors that respond to head movement or blinking.
- Small batteries to power the electronic components.
Building Electronic Moving Lenses
- This method requires basic electronics knowledge.
- Start with simple servo motors attached to lens components.
- Program the Arduino to create natural-looking movements.
- Hide all wiring inside the mask structure.
- Ensure the electronics don’t add too much weight to the mask.
- Test all connections before final assembly.
Professional Tips for All Methods
Making any Spider Man mask look professional comes down to attention to detail.
Here are insider tips from experienced mask makers:
Color Matching
- Use reference images from actual Spider-Man movies or comics.
- The red should be bright but not neon.
- Black lines should be crisp and clean.
- Consider the lighting where you’ll wear the mask.
Web Pattern Perfection
- The web pattern is what makes a Spider-Man mask instantly recognizable.
- Start with light pencil lines before making them permanent.
- Use a ruler or straight edge for all straight lines.
- Make sure the pattern is symmetrical on both sides.
- The web should radiate from a central point on the forehead.
Comfort and Fit
- A mask that doesn’t fit well won’t look good no matter how well made it is.
- Test the fit multiple times during construction.
- Add padding in areas that touch your face.
- Make sure you can breathe and see clearly.
- The mask should stay in position without constant adjustment.
Finishing Techniques
- Sand all rough edges smooth.
- Apply multiple thin coats rather than one thick coat of paint.
- Allow each coat to dry completely.
- Use primer on surfaces that will be painted.
- Seal painted surfaces with a clear protective coat.
Troubleshooting Common Problems
Every DIY project has potential issues, but most are easy to fix.
Eye Holes Too Small
- This is the most common problem with homemade masks.
- Carefully enlarge the holes using small cuts.
- Test the fit frequently as you make adjustments.
- Remember, you can always make holes bigger but can’t make them smaller.
Web Pattern Mistakes
- If you mess up the web pattern, don’t start over completely.
- Use correction fluid or paint to cover mistakes.
- Let corrections dry completely before redrawing.
- Sometimes imperfect patterns look more realistic anyway.
Paint Issues
- Paint running or dripping creates an unprofessional look.
- Use tape to create clean lines.
- Apply paint in thin, even coats.
- Work in a dust-free environment to avoid particles in the paint.
Comfort Problems
- If the mask is uncomfortable, add foam padding.
- Adjust the elastic or ties for better fit.
- Consider making the eye holes larger for better peripheral vision.
- Make sure there are no sharp edges touching your skin.
Cost Breakdown for Each Method
Budget planning helps you choose the best method for your needs.
Here’s what each method typically costs:
Paper Mask Costs
- Paper: $2-3
- Markers/Paint: $5-8
- Elastic/String: $1-2
- Total: $8-13
Cardboard Mask Costs
- Cardboard: $3-5
- Paint: $6-10
- Tools: $8-12
- Total: $17-27
Fabric Mask Costs
- Fabric: $8-15
- Thread: $2-3
- Paint/Markers: $5-8
- Total: $15-26
Moving Eyes Version Costs
- Basic mask materials: $15-25
- Moving parts: $10-20
- Special tools: $15-30
- Total: $40-75
Electronic Lenses Version Costs
- Basic mask: $15-25
- Electronics: $25-50
- Programming tools: $20-40
- Total: $60-115
Time Requirements for Each Method
Planning your time ensures you can complete your project without rushing.
Quick Paper Version
- Planning: 30 minutes
- Construction: 1-2 hours
- Drying time: 2-4 hours
- Total active time: 1.5-2.5 hours
Cardboard Version
- Planning: 45 minutes
- Construction: 2-3 hours
- Painting and drying: 4-6 hours
- Total active time: 2.5-3.5 hours
Fabric Version
- Pattern making: 1-2 hours
- Cutting and sewing: 2-4 hours
- Decorating: 1-3 hours
- Total active time: 4-9 hours
Advanced Moving Parts
- Basic construction: 3-5 hours
- Mechanism building: 4-8 hours
- Testing and adjustment: 2-4 hours
- Total active time: 9-17 hours
Safety Guidelines for All Methods
Safety should always come first when making any DIY project.
Tool Safety
- Always use sharp tools away from your body.
- Cut on a stable surface with proper lighting.
- Keep first aid supplies nearby when working.
- Adult supervision required for children using any cutting tools.
Material Safety
- Use only non-toxic paints and markers.
- Ensure good ventilation when painting.
- Test all materials on a small area first to check for allergic reactions.
- Wash hands thoroughly after handling paints and adhesives.
Wearing Safety
- Make sure the mask doesn’t restrict breathing.
- Eye holes should provide adequate peripheral vision.
- Remove the mask immediately if you feel dizzy or short of breath.
- Never wear the mask while driving or operating machinery.
Advanced Techniques for Experienced Builders
Once you’ve mastered the basics, try these advanced methods.
3D Printed Components
- Design custom eye pieces using CAD software.
- Print flexible joints for moving parts.
- Create precise templates for perfect symmetry.
- Combine 3D printed parts with traditional materials.
Professional Weathering Effects
- Add battle damage for a more realistic look.
- Use dry brushing techniques for depth.
- Create wear patterns around high-contact areas.
- Add subtle dirt and grime effects.
Multi-Layer Construction
- Build the mask in separate layers for depth.
- Create raised web lines using additional materials.
- Add internal structure for better shape retention.
- Incorporate hidden compartments for electronics.
Frequently Asked Questions
How to make a Spider-Man mask at home?
You can use red stretchy fabric, black fabric paint for webbing, and white mesh or plastic for the eyes. Cut and sew the fabric into a snug head cover. Attach the eye pieces securely for visibility.
How do Spider-Man’s mask eyes move?
In movies, the moving eyes are special effects or mechanical props built into the mask. In comics, the eye movement is artistic expression, not realistic mechanics.
What material is Spider-Man’s mask made of?
In films, it’s often spandex or lycra for stretch and comfort. The eyes are made from white mesh or tinted plastic to allow visibility.
How to become a Spider-Man?
You can’t get real spider powers, but you can train in agility, parkour, and martial arts. Combine that with a Spider-Man costume for the look.
How to make Spider-Man very easy?
Use a red ski mask or balaclava, draw web lines with a black marker, and add white mesh for eyes. This quick version takes under 30 minutes.
Why did Spider-Man wear a mask?
Peter Parker wears the mask to hide his identity and protect loved ones from enemies. It also adds to his superhero persona.
How to make Michael Myers mask at home?
Use a plain white rubber or latex mask, cut the eye holes, and paint subtle shading. Add synthetic hair or use a pre-made wig.
Can anyone wear the mask in Spider-Man?
Yes, in the comics and films, different characters have worn Spider-Man’s mask. However, each brings their own style and abilities to the role.
Conclusion
Learning how to make a Spider Man mask yourself opens up a world of creative possibilities.
Whether you choose the simple paper method or go all out with moving lenses, the key is to start with a method that matches your skill level.
Remember that every expert was once a beginner, so don’t be discouraged if your first attempt isn’t perfect.
Making a homemade Spider Man mask is not just about saving money – it’s about the satisfaction of creating something amazing with your own hands.
The techniques you learn making a Spider-Man mask can be applied to countless other costume and craft projects.
Start with basic materials and simple methods, then gradually work your way up to more advanced techniques as your skills improve.
Most importantly, have fun with the process and don’t be afraid to experiment with your own creative ideas.
Your DIY Spider Man mask will be unique because you made it yourself, and that’s something no store-bought mask can ever match.
Now grab your materials and start creating your own amazing Spider-Man mask today!